
As an Amazon Associate I earn from qualifying purchases. This page may contain affiliate links.
Pot roast beef brisket is one of the most forgiving ways to cook a tough, collagen-rich cut. By searing the meat, then braising it low and slow in a covered pot with liquid and aromatics, you turn a stubborn flat into slices that hold together yet melt on the fork. This guide walks through choosing the right brisket, prepping and searing, building the braise, timing the cook, and finishing the gravy.
What Makes Pot Roast Beef Brisket Different from Smoked Brisket
Smoked brisket relies on hours of low smoke and a bark that forms on the surface. Pot roast beef brisket skips the smoker entirely. Instead, the meat sits in a small amount of liquid inside a heavy covered vessel, and the steam and moisture do the work. The result is a softer, more braised texture with a rich, beefy sauce rather than a smoky crust. If you are curious about how the cut itself compares to other proteins, the article Is Brisket Beef or Pork? Key Differences Explained (2026) covers the basics.
Choosing the Right Cut
Most home cooks use the flat, which is leaner and more uniform, though the point (deckle) has more fat and can be very forgiving in a braise. Look for a piece with a fat cap of about a quarter inch, good marbling in the meat, and a relatively even thickness so it cooks at the same rate. A 3- to 5-pound flat is a practical size for a standard Dutch oven or large braising pot.
Flat vs. Point for Braising
- Flat: Leaner, neater slices, easy to portion. Benefits from careful timing so it does not dry out.
- Point: More fat and connective tissue, shreds readily, extra juicy. Good for pulled-style pot roast.
- Whole packer: Works, but is large and usually needs a roasting pan and a lot of liquid to fit.
Gear and Ingredients You Need
Before you start, gather everything so the sear and braise run smoothly.
- A heavy Dutch oven or braiser with a tight-fitting lid, sized so the brisket fills it without crowding.
- Paper towels, kosher salt, and coarse black pepper.
- Neutral high-smoke-point oil such as canola or avocado.
- Two large onions, four to six carrots, four stalks of celery, and a head of garlic.
- Beef stock or broth, about 3 to 4 cups for a 4-pound flat.
- Red wine or beer for deglazing (optional but useful).
- Tomato paste, bay leaves, fresh thyme, and rosemary.
- A meat thermometer, preferably probe-style.
Step 1: Trim and Season the Brisket
Pat the brisket completely dry. Trim the fat cap to about a quarter inch, removing any hard, waxy pieces but leaving the rest to baste the meat. Season generously on all sides with kosher salt and coarse pepper, about one tablespoon of kosher salt per pound as a starting point. Let it rest at room temperature for 30 to 45 minutes, or salt it the night before and refrigerate uncovered so the surface dries further.
Step 2: Sear for Flavor
Heat the Dutch oven over medium-high with a thin layer of oil until it shimmers. Place the brisket fat side down and sear without moving it for 6 to 8 minutes, until deep brown. Flip and sear the other sides, including the edges, for another 10 to 12 minutes total. Work in batches if needed rather than crowding the pot. Transfer the meat to a plate. Do not skip this; the browning builds the flavor base for the entire braise.
Step 3: Build the Aromatic Base
Lower the heat to medium. Add the chopped onions, carrots, and celery to the drippings and cook for 8 to 10 minutes, scraping up the browned bits. Stir in the garlic and tomato paste and cook for another minute until the paste darkens slightly. Deglaze with about half a cup of red wine or beer, scraping the bottom thoroughly. Add the stock, bay leaves, thyme, and rosemary.
Step 4: Braise Low and Slow
Return the brisket to the pot, fat side up, with the liquid coming about halfway up the side of the meat. You want braising, not boiling, so the liquid should sit just below a simmer. Cover tightly and transfer to an oven preheated to 300°F, or simmer on the stovetop over the lowest heat that keeps a gentle bubble.
Timing by Weight
| Brisket Weight | Approximate Braise Time at 300°F | Target Internal Temperature |
|---|---|---|
| 2 to 3 lbs (flat) | 2.5 to 3 hours | 195 to 203°F |
| 3 to 4 lbs (flat) | 3 to 3.5 hours | 195 to 203°F |
| 4 to 5 lbs (flat or point) | 3.5 to 4.5 hours | 195 to 203°F |
Times are approximate and depend on the shape of the cut, the vessel, and your oven. Test for doneness by probing: the meat should slide in and out of a probe or fork with little resistance. Connective tissue breaks down most fully in roughly the 195 to 203°F range.
Step 5: Rest, Slice, and Finish the Sauce
Move the brisket to a cutting board and tent it loosely with foil for 20 to 30 minutes. Meanwhile, strain the braising liquid into a saucepan, pressing on the vegetables. Skim off excess fat, then simmer until reduced by about a third. Taste and adjust with salt, pepper, or a splash of vinegar. For clean slices, cut against the grain. Serve with the vegetables and sauce spooned over top.
Tips for Better Results
- Use a pot that fits the brisket snugly so the liquid covers the bottom third of the meat without swimming the whole thing.
- Braise the day before and chill overnight. Fat solidifies on top, making it easy to lift off, and the slices firm up for cleaner cuts.
- Reheat slices gently in some of the sauce, covered, rather than in the microwave.
- For a deeper flavor, add a few dried chiles or a spoon of Worcestershire sauce to the braise.
Common Mistakes
- Skipping the sear. Braising alone produces a grayish, flat-tasting result.
- Boiling the liquid. A hard boil toughens the outer muscle fibers. Keep it at a gentle simmer.
- Pulling too early. If the meat is still firm at the typical time, give it more time rather than raising the heat.
- Slicing with the grain. Even perfectly cooked brisket can seem chewy if sliced incorrectly.
- Drowning the meat. Too much liquid dilutes flavor and washes away the crust you built during searing.
Recommended gear
- Enameled cast iron Dutch oven: Even heat and a tight lid make it the easiest vessel for a braise and sear in one pot. View on Amazon
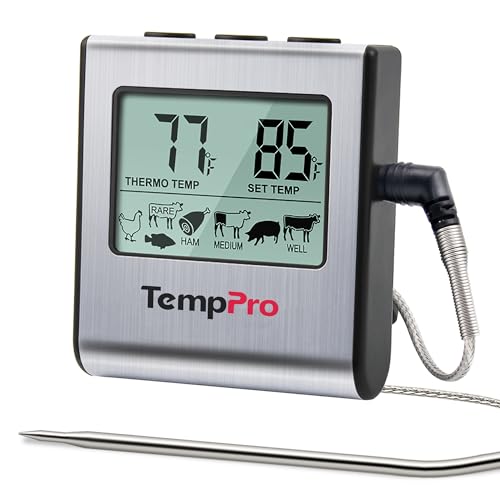
- Instant-read or probe thermometer: Confirms the 195 to 203°F window so you know when the collagen has broken down. View on Amazon
- Heavy-duty cutting board with juice groove: Catches the rested juices for the sauce and keeps the counter tidy. View on Amazon
If you are looking for a different approach, Easy Oven Cooked Beef Brisket Recipe with Video: 5 Simple Steps and Beef Brisket Recipe Oven: Step-by-Step Guide for Tender Results show oven methods without a braising liquid. For a hands-off version, Crock Pot Brisket Recipe: A Step-by-Step Guide for Tender Results and Easy 3 Ingredient Crock Pot Beef Brisket Recipe: Steps and Tips are useful companions.
FAQ
Can I make pot roast beef brisket without searing it first?
You can, but the meat will look pale and taste less rich. Searing creates browned flavor compounds that carry through the braise. If you are short on time, at least brown the surface well.
Should I use the flat or the point?
The flat slices more neatly and is leaner, while the point has more fat and shreds easily. Either works. Choose the flat for sliced pot roast and the point if you prefer a fall-apart texture.
How much liquid do I need?
Generally, enough to come about halfway up the side of the brisket, roughly 3 to 4 cups for a 4-pound flat. The meat should not be fully submerged.
Why is my brisket tough after braising?
It is usually undercooked or was boiled too hard. Connective tissue needs time at a gentle simmer to break down. Give it more time and check for a probe-tender feel.
Can I cook it in a slow cooker?
Yes. Sear on the stove first for flavor, then cook on low for 8 to 10 hours or until probe-tender. The texture will be very soft, so slice carefully or shred it.
How do I store and reheat leftovers?
Refrigerate slices in their sauce for up to four days. Reheat gently, covered, over low heat or in a low oven, adding a splash of stock if the sauce has thickened.
Is it safe to eat brisket that is slightly pink near the center?
Braised brisket is cooked well past the safe internal temperature for beef, so it should not be pink. If you have concerns about food safety or handling, consult a local food safety authority or a professional.
Conclusion
Pot roast beef brisket rewards patience more than skill. Sear well, keep the braise at a gentle simmer, and cook until the probe slides in easily rather than watching the clock. Let the meat rest, skim and reduce the sauce, and slice against the grain. Once you have the method down, you can adjust the aromatics and liquid to suit your taste.