
As an Amazon Associate I earn from qualifying purchases. This page may contain affiliate links.
Caramelized pulled beef brisket in a rich spicy sauce is a great way to turn a tough, collagen-heavy cut into tender, sticky shreds with deep, layered flavor. In this guide you will smoke or braise a brisket until it pulls apart easily, build a glossy sauce with real heat and sweetness, and finish the meat so the edges caramelize without drying out. The method works in a smoker, an oven, or a slow cooker, and the steps below explain how to adjust each one.
What You Need Before You Start
Brisket is a forgiving cut, but it rewards planning. A whole packer brisket usually weighs between 10 and 14 pounds raw, and the flat and point muscles cook at slightly different rates. For pulled brisket, you want the point, the fattier half, or a whole packer, because the extra fat keeps the shreds juicy after they are sauced.
Shopping for one? See our guide: Is Brisket Beef or Pork? Key Differences Explained (2026).
Equipment checklist
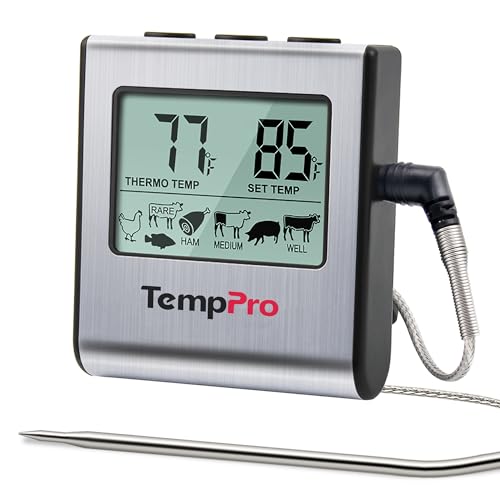
- A probe thermometer (a leave-in model with a wire is easiest for long cooks)
- A heavy roasting pan or disposable foil pan with a tight lid
- Heavy-duty aluminum foil or butcher paper
- A large saucepan for the sauce
- Two forks or meat claws for shredding
- A sheet pan for the final caramelizing step
Ingredients for the rub and spicy sauce
For a 10 to 12 pound packer, start with about 1/3 cup kosher salt and 1/3 cup coarse black pepper, plus 2 tablespoons garlic powder, 2 tablespoons paprika, and 1 tablespoon chili powder. For the sauce, combine 2 cups ketchup or tomato sauce, 1/2 cup apple cider vinegar, 1/4 cup brown sugar, 2 tablespoons Worcestershire sauce, 1 tablespoon smoked paprika, 1 to 2 teaspoons cayenne depending on your heat tolerance, 2 minced chipotle peppers in adobo, and 3 cloves minced garlic. Add 1 cup beef stock or the strained braising liquid to loosen it.
Step 1: Trim and Season the Brisket
Trim the hard fat cap to about 1/4 inch. Leave the fat that sits between the flat and point, since it renders into the meat. Pat the brisket dry, then coat it lightly with yellow mustard or a neutral oil to help the rub stick. Season generously on all sides with the salt and pepper base, then add the paprika, chili powder, and garlic. Rest the seasoned brisket uncovered in the refrigerator for at least 4 hours, or overnight if you have time. This dry rest improves the bark in a smoker and helps the seasoning penetrate.
Step 2: Set Up Your Cooking Method
You have three reliable options. Each one produces tender meat, but the flavor and texture differ slightly.
| Method | Temperature | Approximate time | Best for |
|---|---|---|---|
| Smoker or pellet grill | 225 to 250°F | 1 to 1.5 hours per pound | Deepest smoke flavor and bark |
| Oven with foil pan | 275 to 300°F | About 1 hour per pound | Consistent results with no smoker |
| Slow cooker | Low setting | 10 to 12 hours | Hands-off cooking and very moist meat |
For more detail on timing by weight and temperature, see How Long to Smoke a Brisket? Times by Weight and Temperature. If you are working in an oven, Cooking Brisket in Oven: A Step-by-Step Guide for Tender Results covers pan setup and foil wrapping in depth.
Step 3: Cook Until the Brisket Is Tender
Place the brisket fat side up in the cooker. Cook until the internal temperature reaches about 160 to 170°F, then wrap it tightly in foil or butcher paper. This wrap pushes the stall past its plateau and keeps the bark from turning leathery. Continue cooking until the probe slides into the thickest part with little resistance, usually between 200 and 205°F. Probe tenderness matters more than the exact number, so check several spots.
Managing the stall
The stall is the flat period where internal temperature stops rising for one to three hours. It is caused by evaporative cooling as moisture leaves the surface. Wrapping shortens it. Do not raise the cooker temperature to force it through, because that tightens the muscle and dries the outer layer.
Step 4: Rest the Brisket
Rest the wrapped brisket in a dry cooler or an oven set to its lowest setting for at least one hour, and up to four. A long rest lets the connective tissue finish relaxing and redistributes juices. Brisket that goes straight from the cooker to the cutting board tends to release liquid and dry out.
Step 5: Build the Rich Spicy Sauce
While the brisket rests, combine the sauce ingredients in a saucepan except the beef stock. Simmer over medium-low heat for 15 to 20 minutes, stirring often so the sugars do not scorch. Blend with an immersion blender if you want a smooth glaze, or leave it chunky for a more rustic look. Add the stock or a few spoonfuls of strained braising liquid until the sauce coats the back of a spoon. Taste and adjust: more vinegar brightens it, more brown sugar softens the heat, and more cayenne sharpens it.
If you want a deeper base, see How to Make and Customize Homemade Barbecue Sauce for ways to change the sweetness and acidity.
Step 6: Shred the Brisket
Pull the foil back and pour off the rendered liquid into a fat separator. Keep the liquid, because it carries a lot of flavor. Use forks or claws to shred the meat, working against the grain where you can, and remove any large pieces of hard fat. For a more uniform texture, shred into clumps about 2 to 3 inches across rather than fine threads.
Toss the shredded meat with about half the sauce and a few tablespoons of the defatted braising liquid. Add liquid gradually. The goal is moist, not soupy.
Step 7: Caramelize the Edges
This final step gives the caramelized character your recipe promises. Spread the sauced meat on a sheet pan in a thin, even layer, with some pieces exposed to the surface. Set your oven or grill to 400 to 425°F. Broil or grill for 5 to 8 minutes, watching closely, until the edges darken and the sauce bubbles and sets into sticky, browned bits. Drizzle the remaining sauce over the top and serve immediately.
Tips for even caramelization
- Use a thin layer so heat reaches the sauce quickly.
- Keep an eye on sugar-heavy sauces, since they can burn in under a minute at broiler heat.
- Rotate the pan halfway through for even color.
Common Mistakes
- Skipping the rest. Shredding hot brisket right away lets juices escape and makes the meat dry.
- Overcooking in the sauce. Simmering shredded brisket in thin sauce for a long time can make it mushy. Keep the final heat short.
- Using too much heat. Pushing the cooker above 275°F to speed things up often produces tough, dry meat with a bitter crust.
- Adding sugar too early in the cook. Sugary rubs or mops can burn before the brisket is done. Save the sweet sauce for the end.
- Ignoring salt levels. Ketchup and Worcestershire add salt, so taste before you add more.
Recommended gear
A leave-in wireless probe lets you monitor the brisket without opening the lid, which helps with the stall and the final tenderness check. A pair of heat-resistant shredding claws makes pulling large pieces faster. A fat separator makes it easy to skim the braising liquid before you build the sauce.
- A wireless leave-in meat thermometer helps you track the stall and the final probe test without opening the cooker. View on Amazon
- Meat shredding claws speed up pulling and keep your hands away from hot meat. View on Amazon
- A fat separator pitcher lets you pour off the rendered fat and keep the flavorful liquid for the sauce. View on Amazon
Tips for Better Results
- Choose a packer with an even fat cap and a thick point for the most juicy shreds.
- Let the sauce cool slightly before you toss it with meat to avoid steaming the sugars.
- Make the sauce a day ahead. The flavors meld and the texture thickens.
- For more heat, add the chipotle and cayenne in stages and taste between additions.
- Serve with a crisp slaw or pickles to balance the richness. For more ideas, see BBQ Sides, Sauces, Dry Rubs and Grilled Vegetables.
FAQ
Can I make caramelized pulled beef brisket without a smoker?
Yes. Cook the brisket in a covered roasting pan in an oven at 275 to 300°F, then follow the same wrap, rest, shred, and caramelize steps. The flavor will be milder without smoke, so you can add a teaspoon of smoked paprika or a few drops of liquid smoke to the sauce.
What internal temperature should pulled brisket reach?
Most cooks aim for 200 to 205°F, but tenderness is the real test. The probe should slide into the thickest part of the meat with little resistance. Check several spots, since thickness varies across the cut.
How spicy should the sauce be?
Start with 1 teaspoon of cayenne and 1 chipotle pepper for a noticeable but moderate heat. Add more gradually and taste after simmering, because the heat develops as the sauce sits.
Why is my brisket tough after cooking?
Tough brisket usually means it came off the heat before the connective tissue broke down, or it was cooked too hot and fast. Return it to the cooker and check tenderness again. Brisket often needs to go past 195°F before it feels tender.
Should I use the flat or the point?
The point has more fat and marbling, so it stays juicier when pulled. The flat is leaner and yields neater slices. A whole packer gives you both, which is ideal for pulled brisket.
Can I make the brisket ahead of time?
Yes. Cook and shred the brisket, then cool it quickly and refrigerate it in its braising liquid. Reheat gently with a splash of liquid, then sauce and caramelize just before serving.
How do I store leftover pulled brisket?
Refrigerate leftovers in an airtight container with some of the braising liquid for up to four days. For longer storage, freeze portions in liquid for up to three months. Reheat to 165°F or higher.
Is brisket the same as beef chuck for pulled meat?
No. Chuck is a different cut from the shoulder and can also be pulled, but brisket has a richer, beefier flavor and a more distinct texture when rendered. For a comparison of cuts, see How to BBQ Different Beef Cuts: From Brisket to Ribeye.
Conclusion
Caramelized pulled beef brisket in a rich spicy sauce comes together in a few clear stages: season and rest, cook low and slow with a wrap, rest long, shred, sauce, and finish hot. Each step has a clear goal, from tender connective tissue to glossy, sticky edges. Adjust the heat and sweetness to your taste, and you will have a centerpiece worth making again.