
As an Amazon Associate we earn from qualifying purchases. This page may contain affiliate links.
A beef brisket recipe oven method lets you get close to classic smoker results without a dedicated smoker. You will season a whole packer brisket, roast it low and slow at 275°F, wrap it at the stall, and pull it when the probe slides in like warm butter, usually between 195°F and 205°F internal. The steps below cover prep, timing, wrapping, resting and slicing, plus the mistakes that turn a good brisket into a dry one.
What You Need Before You Start
A packer brisket is the full cut: the flat and the point, still joined by fat and connective tissue. Most home cooks find a 10 to 13 pound packer easy to manage in a standard oven, though larger ones will need a longer cook window and a deep enough roasting pan. Our guide on How to BBQ Different Beef Cuts: From Brisket to Ribeye explains how the flat and point differ, which helps when you are shopping.
Gear checklist
- Packer brisket, 10 to 13 pounds, USDA Choice or Prime if available
- Kosher salt and coarse black pepper (or a simple salt-and-pepper rub)
- Roasting pan with a rack, deep enough to hold the brisket and drippings
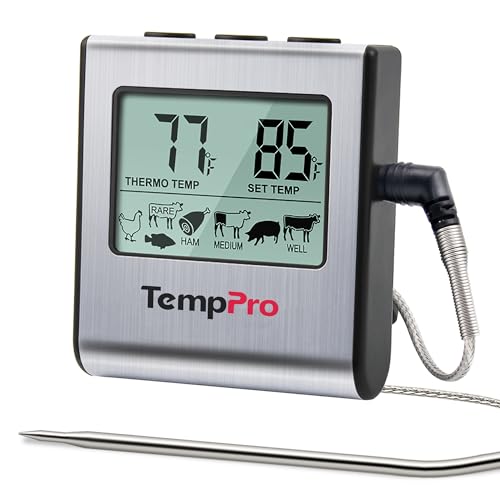
- Instant-read thermometer and a leave-in probe thermometer
- Heavy-duty aluminum foil or pink butcher paper
- Sharp boning or slicing knife and a cutting board with a juice groove
- Large insulated cooler or a towel-lined warm spot for resting
Step 1: Trim and Season the Brisket
Trim the fat cap to about 1/4 inch thick. Leave that cap on. It bastes the meat during the cook, and it will render down as the brisket roasts. Remove any hard silver skin and loose chunks of fat from the sides and point, since they will not soften well.
For seasoning, a basic salt-and-pepper rub works very well. Use roughly 1 teaspoon of kosher salt per pound of meat, and an equal amount of coarse black pepper by volume. Coat every surface, including the sides. If you have time, season the brisket the night before and refrigerate it uncovered on a rack. The salt penetrates deeper and the surface dries slightly, which helps form a better bark.
Step 2: Set Up Your Oven for a Low, Slow Roast
Preheat the oven to 275°F. Set a rack in the lower-middle position so the brisket sits in the center of the oven. Place the rack inside the roasting pan, and add about a cup of beef broth or water to the pan. The liquid keeps the oven humid and slows surface drying. Some cooks prefer to skip the liquid and rely on the wrap later, which is also a valid approach.
Place the brisket fat side up on the rack. Insert your leave-in probe into the thickest part of the flat, avoiding the pan and the fat pocket between the flat and point. Keep the probe wire clear of the oven door.
Step 3: Plan Your Cook Time
Brisket timing is not a fixed formula. Expect roughly 1 to 1.5 hours per pound at 275°F, but treat that as a planning estimate. Thickness, starting temperature and oven accuracy all change the timeline. A 12-pound brisket might finish in 12 to 18 hours, so plan around the internal temperature rather than the clock.
| Internal temperature | What is happening | Your action |
|---|---|---|
| 100°F to 150°F | Early rendering begins, bark starts to set | Check oven temp, leave it alone |
| 150°F to 170°F | Stall: temperature may plateau for hours | Wait, or wrap if the bark is dark enough |
| 170°F to 185°F | Connective tissue starts breaking down | Wrap tightly in foil or butcher paper |
| 195°F to 205°F | Tender, probe slides in with little resistance | Pull from oven and begin resting |
Step 4: Wrap at the Stall
Around 165°F to 175°F, the brisket often stalls. Evaporative cooling from the surface holds the temperature flat, sometimes for several hours. Wrapping speeds things up and keeps moisture in. Two options work well:
- Heavy-duty foil: Wraps tightly and cooks faster. The bark softens a little more, which some people prefer for a fork-tender result.
- Pink butcher paper: Breathes more than foil, so the bark stays firmer. It typically takes a bit longer to reach the target temperature.
Wrap the brisket fat side up, and include a splash of broth inside the foil if you like. Return it to the oven, uncovered pan or on a sheet pan, and continue to 195°F to 205°F.
Step 5: Rest the Brisket Properly
Resting is not optional. Pull the brisket when the probe feels tender, then let it rest for at least one hour, and up to four hours wrapped in towels inside a cooler. Resting lets the juices redistribute and lets the meat firm up enough to slice cleanly. A brisket sliced straight from the oven will bleed out and feel dry.
Step 6: Slice Against the Grain
Find the direction of the muscle fibers on the flat, which run in one general direction across the cut. Slice across them into pieces about 1/4 inch thick. The point has fibers running in a different direction, so slice it separately, or cut it into cubes if you want burnt ends. Serve the brisket with some of the defatted drippings spooned over the top.
Common Mistakes to Avoid
- Cooking too hot. Going above 300°F tightens the muscle fibers before the collagen has broken down. Keep the oven at 250°F to 275°F.
- Pulling by time alone. A brisket that is “done” at 10 hours might need 14. Trust the probe test, not the clock.
- Skipping the trim. A thick fat cap blocks seasoning and can leave a greasy layer. Trim to about 1/4 inch.
- Wrapping too early. Wrapping before the bark forms can leave the crust soft and pale. Wait until the surface is dark and set.
- Slicing too soon or with the grain. Cutting with the fibers makes the slices stringy. Always rest first and slice across the grain.
- Using the wrong pan. A pan that is too small forces the brisket to steam unevenly. Use a pan with enough room around the meat.
Tips for Better Oven Brisket
- Use a dual-probe setup so you can monitor both the flat and point. The point often runs hotter and finishes later.
- Add a few tablespoons of beef broth or a light smoke flavoring to the pan if you want more depth. Keep additions modest so they do not overpower the beef.
- Cook the brisket a day ahead. Chill it fully after resting, slice cold, then reheat slices in a covered pan with broth at 300°F. Slices hold their shape better this way.
- If you want more smoke character, the Beginner BBQ Meat Recipes: Burgers, Chicken, Pork Shoulder and Steak guide covers other low-and-slow methods that pair well with a similar temperature plan.
Recommended Gear
A few inexpensive tools make oven brisket noticeably more predictable.
- Leave-in probe thermometer: Lets you monitor the internal temperature without opening the oven door, which keeps heat steady. Check price on Amazon
- Heavy roasting pan with rack: A rack keeps the bottom bark from steaming, and the walls contain the drippings. Check price on Amazon
- Pink butcher paper: Lets the brisket breathe during the wrap, so the bark stays firmer than with foil. Check price on Amazon
FAQ
Can I cook a brisket in the oven without wrapping it?
Yes, but it takes longer and the stall can last many hours. Many home cooks wrap at about 170°F to shorten the cook and keep the meat moist. An unwrapped brisket can still turn out well if you have patience and a good probe.
What internal temperature should oven brisket reach?
Most cooks pull brisket between 195°F and 205°F, when the probe slides in with little resistance. Use the feel of the probe as your final check, since two briskets at the same temperature can differ in tenderness.
How long does a brisket need to rest?
Rest it at least one hour. Wrapping it in towels and placing it in an insulated cooler can hold it safely warm for up to four hours. Cooling leftovers should follow food safety guidance, so refrigerate cooked brisket within two hours of finishing.
Why is my oven brisket dry?
The most common causes are cooking too hot, pulling too early, slicing before resting, or cutting with the grain. Check the oven temperature with an oven thermometer, cook to the probe test, and slice across the fibers.
Do I need a smoker to make good brisket?
No. An oven can produce a tender, juicy brisket with a flavorful crust, though it will lack the deep smoke character of a wood-fired cook. Adding a small amount of smoke seasoning or using a rub with paprika and black pepper can help close the gap.