
As an Amazon Associate we earn from qualifying purchases. This page may contain affiliate links.
Learning how to smoke a turkey on a pellet grill comes down to four things: a properly thawed bird, a simple brine or dry rub, a steady cooking temperature around 250°F to 275°F, and a thermometer you trust. Follow those steps and you should end up with smoky, moist breast meat, dark and crisp skin, and thighs that pull cleanly from the bone. The whole process takes most of a day, but the hands-on work is short.
What You Need Before You Start
Most of the trouble people have with smoked turkey happens before the bird ever touches the grill. Gather everything first so you are not searching for a pan or a pair of gloves when the bird is already at temperature.
- A whole turkey, fresh or fully thawed, in the 12 to 16 pound range for an easier fit and more even cooking
- A brine container big enough to submerge the bird, or a large cooler and ice
- Kosher salt, brown sugar, and any aromatics you like (garlic, black peppercorns, bay leaves, citrus peel)
- Melted butter or a neutral oil for the skin
- A dry rub or poultry seasoning blend
- A disposable aluminum roasting pan to catch drippings
- Hardwood pellets. Fruitwoods such as apple or cherry are popular with turkey, and a blend with hickory adds more punch
- Two leave-in probe thermometers, or one probe plus an instant-read
- Food-safe gloves, paper towels, and a sheet pan for transfer
Before you buy pellets or plan a cook day, check that your grill is in good shape. A controller that drifts or a hopper that feeds unevenly will cost you more than a bad rub. If your grill tends to run hot or cold, read How to Fix a Grill That Can’t Hold a Steady Temperature before you start.
Step 1: Thaw the Turkey Safely
Frozen turkey needs time. The USDA recommends thawing in the refrigerator, allowing roughly 24 hours for every 4 to 5 pounds. A 14 pound bird usually needs about three days in a fridge set at or below 40°F. Cold-water thawing is faster but requires changing the water every 30 minutes and cooking the bird right away. Do not thaw on the counter.
Remove the giblet packet and neck from the cavity, then pat the bird dry before brining or seasoning. For specific food safety questions, such as thawing times for your bird size, check current USDA FSIS guidance.
Step 2: Brine or Dry Brine the Bird
Brining is the most reliable way to keep turkey breast from drying out on a smoker. Salt pulls the bird’s own moisture into the muscle and changes the protein structure so it holds more water during cooking.
Wet brine
A basic wet brine uses about 1 cup of kosher salt per gallon of water, plus 1/2 cup brown sugar if you want a little color and sweetness. Salt varies by brand: Diamond Crystal is lighter by volume than Morton kosher, so measure by weight if your recipe calls for it, or start with less and taste. Warm a portion of the water to dissolve the salt and sugar, then chill everything fully before the turkey goes in.
Keep the bird submerged in brine for about 12 to 18 hours. Going past 24 hours tends to produce spongy, overly salty meat. Hold the brine at 40°F or colder the entire time, using a cooler packed with ice if your refrigerator is full.
Dry brine
If you have limited space or want crisper skin, a dry brine is easier. Rub the bird inside and out with kosher salt, roughly 1/2 teaspoon per pound, then refrigerate it uncovered for 12 to 24 hours. The uncovered rest dries the skin, which helps it crisp on the grill.
Step 3: Season and Prep the Skin
Rinse a wet-brined bird briefly, then dry it thoroughly with paper towels, inside and out. Moisture on the skin is the enemy of color and crispness, so take your time here.
Brush the skin with melted butter or oil. Then apply a rub. Sugar-based rubs can darken quickly, so if your rub has a lot of brown sugar, consider lowering the grill temperature near the end of the cook. Under the skin is a good place for flavor: loosen the skin over the breast and rub butter, herbs, or seasoning directly onto the meat.
Tuck the wings behind the back and tie the legs loosely with butcher’s twine. This helps the bird hold a compact shape and keeps the wingtips from burning.
Step 4: Set Up the Pellet Grill
Fill the hopper with hardwood pellets and run the startup cycle until the grill reaches your cooking temperature. Most manufacturers recommend preheating for 10 to 15 minutes with the lid closed before placing food on the grate.
Set the controller to 250°F to 275°F for the main cook. Lower temperatures take longer and can leave the skin pale. Higher temperatures speed things up but make the breast more likely to overshoot its ideal doneness before the thighs finish.
Place the turkey breast side up on a rack over the drip pan, or place it directly on the grate if your grill has a flat cooking surface. Put the pan under the bird to catch drippings for gravy. Add a few cups of water or stock to the pan if you want a moist cooking environment and easier cleanup.
Insert one probe into the thickest part of the breast, not touching bone. Place the second probe into the thickest part of the thigh, also away from bone. Close the lid and avoid opening it more than necessary.
Step 5: Smoke to Temperature
Plan on roughly 30 to 40 minutes per pound at 275°F, but treat that as a rough guide only. Cold birds, windy days, and cold outdoor temperatures all add time. Your probes tell you what is actually happening.
| Stage | Grill temperature | Breast target | Thigh target |
|---|---|---|---|
| Smoke phase (first 1 to 2 hours) | 250°F to 275°F | Building color and smoke absorption | Not yet a factor |
| Mid cook | 275°F | About 150°F | About 165°F to 175°F |
| Finish | 275°F to 300°F (optional bump for skin) | 165°F minimum (USDA safe temperature) | 175°F to 180°F for tender dark meat |
| Rest | Off heat, loosely tented | Carryover rises 5°F to 10°F | Carryover rises slightly |
Many pitmasters pull the breast a bit early, around 155°F to 160°F, and let carryover bring it up during the rest. Others prefer to cook to the USDA minimum of 165°F. Either approach works, but cooking to 165°F in the thickest part of the breast guarantees a safe bird.
Smoke flavor is strongest early in the cook. Once the breast reaches about 140°F, most of the color is set. If the smoke is too heavy, the bird can taste bitter or acrid. If you are getting a dirty, sooty look on the skin, see How to Fix a Grill Producing Too Much Smoke, and for dialing in the right amount of smoke, How to Control Smoke Flavor Intensity on Your Grill covers the adjustments.
Step 6: Rest, Carve, and Serve
Move the turkey to a cutting board or sheet pan and tent it loosely with foil. Rest it for at least 30 minutes, and up to an hour for a larger bird. Resting lets the juices settle back into the muscle instead of running out on the board.
Carve the breast off the bone in whole halves, then slice across the grain. Remove the legs and thighs at the joint, and separate the drumsticks from the thighs. Serve with pan drippings, skimmed of excess fat, and a simple gravy if you like.
Common Mistakes to Avoid
- Skipping the thaw check. A bird that is still icy in the center will cook unevenly and can keep the grill in the danger zone for too long.
- Brining too long. More than 24 hours in a wet brine often leaves the meat salty and rubbery.
- Relying on the built-in grill probe alone. The grill’s internal sensor reads the air near the dome, not the bird. Use a probe in the meat.
- Opening the lid constantly. Each open lid drops the temperature and extends cook time, which can dry the breast.
- Cooking on a dirty grill. Old grease causes flare-ups and off flavors. Scrape the grates and clean the drip pan before the cook. For ongoing care, the Pellet Grill Maintenance: Essential Cleaning and Care Schedule guide lays out a practical routine.
- Trusting pellets blindly. Low-quality pellets with fillers can produce ash buildup, inconsistent heat, and bitter smoke. Stick with 100 percent hardwood.
- Carving too early. Cutting straight off the grill sends juices onto the board and leaves the meat drier.
If your grill has trouble with ignition, temperature swings, or feeding pellets during a long cook, Pellet Grill Troubleshooting: Fixing Common Failures walks through the usual causes and fixes. For a broader view of brining and cooking approaches, How to Smoke a Turkey: Brining and Cooking Methods compares methods side by side.
Recommended Gear
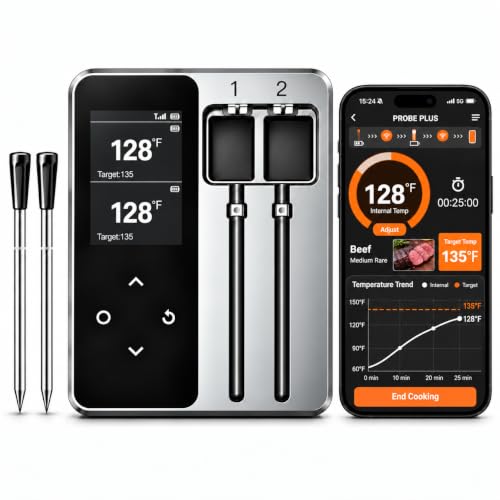
- Leave-in probe thermometer with two sensors. Monitoring breast and thigh at the same time removes most of the guesswork and lets you pull the bird at the right moment. Check price on Amazon
- Large brining bucket or food-safe brine bag. A container that holds the whole bird under liquid keeps brining even and makes refrigeration easier. Check price on Amazon
- Heavy-duty disposable roasting pan. A sturdy pan holds drippings and a few cups of liquid without warping on the grill. Check price on Amazon
- Hardwood pellets, 100 percent wood. Pure hardwood burns cleanly and produces consistent smoke for poultry. Check price on Amazon
FAQ
What temperature should I smoke a turkey on a pellet grill?
Most cooks set the grill between 250°F and 275°F for the main cook. Raise it to around 300°F near the end if you want crisper skin, but watch the breast closely.
How long does it take to smoke a turkey on a pellet grill?
Plan roughly 30 to 40 minutes per pound at 275°F. A 14 pound bird often takes 7 to 9 hours, though weather and bird temperature can change that. Use a probe, not the clock, to decide when it is done.
Do I need to brine a turkey before smoking it?
You do not have to, but brining or dry brining helps the breast stay moist during a long cook. A wet brine of 12 to 18 hours or a dry brine of 12 to 24 hours both work well.
What wood pellets are best for smoked turkey?
Fruitwood pellets such as apple or cherry give a mild, sweet smoke that suits poultry. Adding some hickory or a hickory blend gives a stronger, more classic flavor. Use 100 percent hardwood pellets with no fillers.
What internal temperature is safe for smoked turkey?
The USDA considers 165°F safe for poultry, measured in the thickest part of the breast and the innermost part of the thigh and wing. Many cooks take dark meat higher, around 175°F to 180°F, for better texture.