
As an Amazon Associate we earn from qualifying purchases. This page may contain affiliate links.
A pit boss pellet grill is ready for real cooking once you have assembled it, burned off the factory residue, and run a test cook at a known temperature. This guide walks you through that process in order, then covers the settings, pellet choices and habits that keep your cooks consistent. Owners often report that most early frustrations come from skipping one of these steps, so it is worth going through them in sequence.
Before You Start: What You Need
Gather a few items before the first fire. Most of them are inexpensive, and having them ready keeps the first session from turning into a scramble.
- The owner’s manual for your specific model. Controller layouts and recommended break-in steps vary between models.
- A bag of hardwood pellets. Use food-grade pellets made for smoking or grilling, not heating pellets.
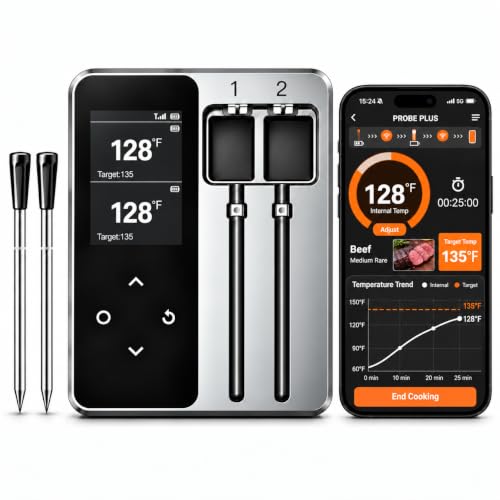
- A dual-probe digital thermometer with a wired or Bluetooth probe for checking the cook chamber and meat at the same time.
- A grill brush or scraper made for cooking grates.
- A shop vacuum or ash tool for clearing the firepot and the bottom of the chamber.
- Heat-resistant gloves and a long-handled lighter or fire starter.
- A drip tray liner or foil to protect the grease tray.
Safety note: Pellet grills use electricity and open fire. Operate the grill outdoors, at least several feet from the house, deck railings and anything combustible, and never in a garage, enclosed porch or tent. Keep it clear of overhanging branches. If you have a question about wiring, a damaged cord or a gas or electrical issue, consult a qualified electrician or the manufacturer’s service team before operating the unit.
Setting Up Your Pit Boss Pellet Grill
Assembly and Placement
Follow the manual’s assembly order closely. Tighten bolts snugly but do not overtighten sheet metal, since it can warp. Once assembled, place the grill on a flat, level surface with clearance on all sides. Manufacturers typically specify minimum clearances from walls and combustibles, so check the number in your manual rather than guessing. Put the grill where the power cord reaches a grounded outlet without stretching it, and keep the cord away from hot surfaces.
Initial Cleaning
New grills often ship with manufacturing oil, dust and packing residue inside the cook chamber. Remove the cooking grates, heat deflectors and grease tray. Vacuum out loose debris, wipe the interior with a damp cloth, and reinstall everything. Do not use harsh chemical cleaners inside the cook chamber, since residue can transfer to food during the first cooks.
Priming the Auger and Loading Pellets
Fill the hopper with pellets. Next, run the auger to get pellets into the firepot. Most controllers have a prime or startup cycle for this. Let it run until pellets appear in the firepot, then stop. Priming matters because an empty auger tube can cause delayed ignition or a weak startup.
Seasoning the Grill and Running a Test Burn
Seasoning burns off manufacturing oils and builds a light protective layer on the interior surfaces. Owners often describe it as the grill’s break-in cook. Your manual will give the exact steps, but the general process looks like this:
- Start the grill with the lid open until the igniter lights the pellets and the fire establishes.
- Close the lid and set the controller to a high temperature, often in the 350 to 400°F range, depending on the model’s guidance.
- Let the grill run for 30 to 60 minutes. Smoke should be thin and clean. Thick white or gray smoke usually means the fire is starved or the pellets are wet.
- Shut the grill down using the controller’s shutdown cycle. Do not unplug it while the fire is still burning, because the auger and fan are part of the shutdown process.
- Once cool, wipe the grates lightly with a high-smoke-point cooking oil.
Learning the Temperature Controller
The controller is what separates pellet grills from traditional smokers. It runs the fan, auger and igniter to hold a set temperature. Learn these functions before your first real cook:
- Set temp: The target cooking temperature. The grill will adjust feed rate to chase this number.
- Smoke or Super Smoke modes: Lower-temperature settings that produce heavier smoke flavor. They are useful for ribs and brisket but can make poultry and thin cuts taste sooty if overused.
- Probe settings: Some models let you set a meat temperature target so the grill shifts to hold mode when the food is done.
- Shutdown cycle: Burns off remaining pellets and cools the firepot. Always use it.
Pellet grills respond slowly. After changing the set temperature, give the chamber 10 to 20 minutes to settle before judging the result. Use your own probe, placed at grate level and away from the firepot, for a more accurate reading than the built-in gauge.
Choosing Pellets and Settings for Your First Cooks
Hardwood pellets are the standard choice. Oak is a neutral, all-purpose flavor. Hickory is stronger and suits pork and ribs. Fruitwoods like apple and cherry add mild sweetness and color. Blends are common and work well for beginners. Keep pellets dry, since moisture swells them and can jam the auger.
Your first cook should be something forgiving. Pork shoulder, chicken thighs or a basic rack of ribs are good choices. The table below lists commonly cited targets. Always confirm doneness with a thermometer rather than relying on time alone.
| Food | Typical Grill Setting | Target Internal Temp |
|---|---|---|
| Chicken thighs (bone-in) | 325 to 350°F | 175 to 185°F for tender dark meat (165°F is the USDA minimum for safety) |
| Pork ribs (spare or baby back) | 225 to 250°F | 195 to 203°F, or tender when bent |
| Pork shoulder | 225 to 250°F | 195 to 205°F, probe-tender |
| Beef brisket | 225 to 250°F | 198 to 205°F, probe-tender |
| Salmon fillets | 250 to 275°F | 125 to 140°F, depending on preferred doneness |
These ranges are general starting points. Thick cuts, bone-in meat and cold starts all change cook times. Plan for longer cooks than you expect, and wrap or rest meat in a cooler if your timing is flexible.
Running Your First Real Cook
Preheat and Load
Preheat the grill to your target temperature for 10 to 15 minutes before loading food. Pat meat dry, season it, and place it on the grates away from the direct path of the heat deflector if the manual notes hot spots. Insert your probe into the thickest part of the meat, avoiding bone and fat pockets.
Monitor Without Opening Constantly
Every time you lift the lid, the chamber loses heat and the controller takes several minutes to recover. Check through the window if your model has one, or rely on your remote probe. When you do open the lid, work quickly.
Rest Before Slicing
Pull meat when it hits the target, wrap it loosely in foil or butcher paper, and rest it for at least 30 minutes. Large cuts like brisket benefit from an hour in a dry cooler wrapped in towels. Resting lets juices redistribute and makes slicing cleaner.
Common Mistakes
- Using the wrong pellets. Heating pellets and wet pellets cause smoke problems and auger jams. Store pellets in a sealed container off the concrete.
- Skipping the shutdown cycle. Unburned pellets left in the firepot can cause flare-ups on the next startup and leave a bitter ash buildup.
- Trusting the built-in thermometer alone. Dome thermometers can read differently from the grate level. Use a separate probe.
- Cooking everything on Smoke mode. Heavy smoke can turn poultry bitter and make thin cuts taste acrid. Match the smoke level to the food.
- Letting ash build up. Ash restricts airflow and can cause temperature swings. Empty the firepot and clean the chamber on a regular schedule.
- Opening the lid too often. Frequent checks extend cook times and make temperature control look worse than it is.
Tips for Consistent Results
- Keep a simple log of setting, pellet type, weather and cook time for each session. Patterns show up quickly.
- In cold or windy weather, expect longer cooks and occasional temperature swings. A grill cover made for your climate can help, though it should never be used while the grill is running.
- Store the hopper lid closed when not in use to keep moisture out of the pellets.
- Check the grease tray before each cook and empty it when it gets heavy.
- Learn your grill’s hot spots by running a test with bread or a row of marshmallows, then rotate food during long cooks.
For ongoing care, a regular schedule is more effective than occasional deep cleaning. Use the maintenance routines in the related guides below to stay on top of it.
Recommended Gear
- Food-grade hardwood pellets: Oak-based or blended pellets give a dependable flavor for beginner cooks, and a single bag lets you test several flavors across a few sessions. Check price on Amazon
- Dual-probe wireless meat thermometer: A second probe lets you monitor the chamber and the meat without opening the lid, which keeps temperatures steady. Check price on Amazon
- Grill cover for pellet grills: A fitted cover protects the controller and hopper from rain and sun, which helps prevent pellet moisture problems. Check price on Amazon
- Drip tray liners: Disposable liners make grease tray cleanup faster and reduce the chance of a grease fire. Check price on Amazon
When Something Goes Wrong
Most early problems are predictable: the grill won’t ignite, the fire goes out, or the temperature swings wildly. Many of these come down to wet pellets, a clogged firepot, a blocked auger or a failed igniter. The step-by-step fixes in Pellet Grill Troubleshooting: Fixing Common Failures cover these in order from simplest to most involved. If you are comparing models or thinking about an upgrade, Pellet Smoker vs Pellet Grill: Is There a Real Difference? explains how the categories differ in cooking performance.
For cleaning, Essential Pellet Grill Maintenance: Cleaning the Firepot and Auger shows how to clear the parts that cause most failures, and Pellet Grill Maintenance: Essential Cleaning and Care Schedule lays out a routine by frequency. Owners of connected models may also find Wi-Fi Pellet Grills: How Smart Features Improve Your BBQ useful for remote monitoring. If you are still deciding which unit fits your cooking, Best Pellet Grills offers a broader comparison.
FAQ
How long should I season a new pit boss pellet grill?
Most owner manuals suggest a burn-in of roughly 30 to 60 minutes at a moderately high temperature. Follow the manual for your model, since the recommended steps can differ.
Can I use any pellets in my pellet grill?
Use food-grade hardwood pellets made for grilling or smoking. Heating pellets and pellets with added binders or oils are not appropriate for cooking food and can cause problems with the auger and firepot.
Why does my grill smoke heavily when it starts?
Some smoke during startup is normal. Heavy, long-lasting white or gray smoke usually means the fire is not fully established, the pellets are damp, or the firepot has ash buildup. Check the pellets and clean the firepot before running again.
Should I open the lid to check food?
Open it as little as possible. Each opening drops the temperature and extends cook time. A remote probe lets you monitor without lifting the lid.
How often should I clean the grill?
Empty ash after every few cooks or whenever the firepot looks full. Scrape the grates each session, clean the grease tray regularly, and do a deeper cleaning of the firepot and auger on a schedule matched to how often you cook.