
As an Amazon Associate we earn from qualifying purchases. This page may contain affiliate links.
A camp chef pellet grill is a wood-pellet cooker that uses an electronic controller to hold a set temperature, so you can smoke, roast, bake, and grill with less hands-on fussing than a charcoal or offset setup. This guide walks you through unboxing and placement, the break-in burn, your first low-and-slow cook, and the routine care that keeps the grill running. By the end, you should be able to start the grill, hold steady temperatures, and know what to check when something goes wrong.
What Makes a Camp Chef Pellet Grill Different
Pellet grills share a basic design. A hopper holds hardwood pellets, an auger feeds them into a firepot, a fan supplies air, and a controller adjusts the feed rate and fan speed to match the temperature you set. Camp Chef sells pellet grills across several lines, so the exact features depend on the model. Some units add a slide-out grease tray, a sear option, or Wi-Fi connectivity, while others stick to the basics. Read the manual for your specific model before you rely on any feature described here, because layouts and controller menus vary between lines.
Pellet grills work differently from direct-flame grills. Heat comes from burning pellets and circulating air, so the cooking chamber behaves more like an oven with smoke flavor than a grill with exposed flames. That is why many owners use the grill for baking and roasting, not just smoking. It also means airflow, a clean firepot, and pellets that feed reliably matter more than they do on a gas grill.
Step 1: Choose the Right Spot and Gear
Placement affects safety and performance more than most beginners expect. Set the grill on a flat, stable surface at least several feet from the house, overhangs, and anything flammable. Leave clearance around the sides and back for airflow and for the vent. Keep it out of enclosed patios or garages, since exhaust and carbon monoxide are real hazards in closed spaces.
Before the first cook, gather these items:
- A 20-pound bag (or similar) of food-grade hardwood pellets from a reputable brand
- A fire extinguisher rated for grease and electrical fires, kept within reach
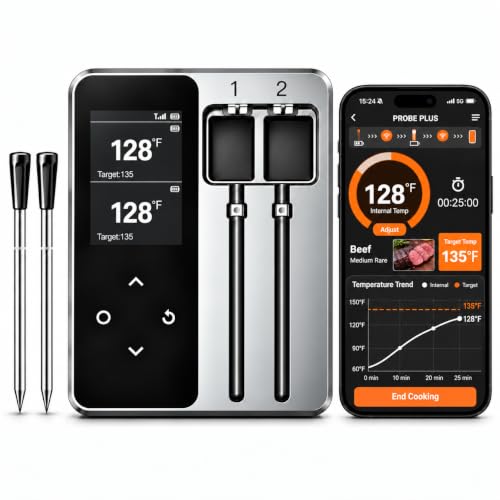
- A reliable instant-read thermometer for checking food, plus a probe thermometer for the chamber
- Heat-resistant gloves and a grill brush or scraper
- A small shop vacuum or ash tool for the firepot and chamber
- Foil drip pans or a grease liner, if your model uses them
- Your owner’s manual and the controller’s quick-start guide
Many owners also keep a weather-resistant cover nearby. A good cover protects the controller and hopper from moisture, which can cause pellets to swell and jam the auger.
Step 2: Assemble, Power On, and Check the Basics
Assemble and inspect
Follow the assembly steps in the manual exactly. Confirm that the legs are level, the grease tray is seated, the heat baffle or deflector is in place, and the firepot is clear of debris. Look for loose screws on the hopper and the auger housing. Packaging materials, shipping foam, or stray bits of metal near the auger can cause jams or fires, so remove anything that does not belong.
Fill the hopper and prime the auger
Pour pellets into the hopper only after the grill is off and cool. Use dry pellets stored in a sealed container. Prime the auger according to the manual’s instructions, which usually means running the feed cycle until pellets reach the firepot. Do not pour pellets directly into the firepot.
Power and connect
Plug the grill into a grounded outlet rated for the load, and avoid extension cords when you can. If your model connects to an app, pair it now so you can monitor temperature from a distance. Our overview of Wi-Fi Pellet Grills: How Smart Features Improve Your BBQ explains what these connections typically do and where they help most.
Step 3: Run the Break-In Burn
New grills often carry manufacturing oils and residues that smell or taste off during the first hours of use. Manufacturers commonly recommend a break-in burn at a high setting, often around 350°F to 400°F, for about an hour with the lid closed. Run the burn in a well-ventilated spot, expect some smoke and odor, and keep the grill away from children and pets while it heats.
After the burn, let the grill cool, then wipe the grates and interior with a damp cloth. Check the firepot for ash and make sure nothing has melted or warped. If anything looks wrong, stop and consult the manual or the manufacturer’s support line before you cook food on it.
Step 4: Learn the Controller Before Your First Cook
The controller is the core of a camp chef pellet grill. Spend a few minutes learning how to set the target temperature, start and stop the cook, change the smoke or temperature mode if your model offers one, and read the probe temperature. Some controllers also include timers, preheat alerts, and alarms for low pellets or temperature swings.
Pay attention to how the grill reacts after you change the setpoint. Pellet grills take a few minutes to stabilize, and it is normal to see the chamber temperature overshoot or drift before it settles. Give it time before adjusting again. Constant changes make the grill hunt for the right setting and can make temperature control look worse than it is.
Step 5: Run Your First Low-and-Slow Cook
Pick a forgiving first cook
Pork shoulder, chicken thighs, or a whole chicken are good first choices because they tolerate small swings in temperature. Brisket and large pork shoulders need longer cooks and more attention to chamber stability, so save them for after you have a few sessions under your belt.
Set the grill and let it stabilize
Preheat the grill with the lid closed until the chamber reaches your target. Most pellet grills, Camp Chef models included, cover a wide range from low smoke temperatures to high roasting settings. Check your manual for the exact range on your unit. Plan on a 10- to 20-minute preheat, depending on the setpoint and outdoor conditions.
Use a probe and verify with a second thermometer
Place the grill’s probe near the grate, away from the food, and insert your instant-read thermometer into the thickest part of the meat when it is close to done. Do not rely on the built-in probe alone. Built-in probes can read differently from the surface of the grate, so compare readings early in the cook to see how your grill behaves.
Target doneness, not time
Cooking times vary with thickness, weather, and how often you open the lid. Use internal temperature targets from a trusted food-safety source. For poultry, the USDA recommends an internal temperature of 165°F. For pork shoulder and brisket, many cooks aim for much higher finishing temperatures to break down connective tissue, but always check the target for the cut you are cooking. Rest the meat before slicing.
Step 6: Routine Care and Cleaning
A clean firepot and a clear auger do more to prevent failures than anything else. Ash buildup can choke airflow and cause temperature swings or flameouts. Grease that collects in the drip tray can become a fire risk. Plan a simple routine:
| Task | When to do it | Why it matters |
|---|---|---|
| Empty grease tray or replace drip pan liner | After every cook, or when it is more than half full | Reduces grease fire risk and flare-ups |
| Brush grates | After every cook, once cool | Prevents food sticking and buildup |
| Vacuum firepot and ash | Every 2 to 4 cooks, or as the manual specifies | Keeps airflow steady and ignition reliable |
| Check hopper for moisture or debris | Before each cook | Damp or dirty pellets can jam the auger |
| Inspect fan and auger area | Monthly during regular use | Catches blockages and loose hardware early |
Always power down and let the grill cool before cleaning the firepot or auger. Use tools that will not damage the grates or interior coatings. For guidance on cleaning without harsh scrapers, see Safe Grill Brush Alternatives and Proper Cleaning Methods.
Common Mistakes to Avoid
- Leaving pellets in the hopper for months. Pellets absorb moisture and can swell, which leads to jams. Keep them sealed and dry.
- Skipping ash cleanout. A heavy ash layer chokes airflow and causes erratic temperatures.
- Opening the lid constantly. Each peek drops chamber temperature and extends cook time.
- Trusting the built-in probe as gospel. Cross-check with a separate thermometer.
- Using the grill in a closed space. Exhaust and carbon monoxide are serious risks indoors or in enclosed garages.
- Ignoring error codes. Note the code, check the manual, and contact support if it repeats.
- Mixing pellet brands or types without thinking. Different woods and fillers burn differently and can affect ignition and ash.
Tips for Better Results
- Set the grill up on a level surface, and check it again if you move it.
- Keep a log of your first few cooks, noting setpoint, pellet type, weather, and internal temperatures. Patterns show up fast.
- Use a higher setting for crisp skin on chicken or roasted vegetables, then lower it for smoke-heavy cooks.
- Let the grill fully cool before covering it, and store the cover dry.
- For a broader look at pellet grill upkeep, see Pellet Grill Maintenance: Essential Cleaning and Care Schedule.
When Something Goes Wrong
Most issues trace back to ignition, airflow, or feed problems. If the grill fails to light, check for pellets in the firepot, a clogged ignition element, and a clean fan path. If the temperature swings wildly, check the ash level and the hopper for moisture. If the auger stops, look for jams and debris near the feed. Work through these in order, and unplug the unit before reaching into the firepot or auger. For a full list of symptoms and fixes, read Pellet Grill Troubleshooting: Fixing Common Failures.
If you are weighing whether a pellet grill suits your cooking style, Pellet Smoker vs Pellet Grill: Is There a Real Difference? covers how the two categories overlap and where they split. For a wider look at fuel types, Types of BBQ Grills: Charcoal, Gas, Pellet and Electric Explained puts pellet grills next to charcoal and gas.
Recommended gear
These items make the routine above easier. None are required, but each addresses a real pain point for pellet grill owners.
- Weather-resistant grill cover. Keeps moisture out of the hopper and controller, which helps prevent jams and electronics problems. Check price on Amazon
- Instant-read digital thermometer. Gives you a fast, independent reading of meat doneness so you are not relying solely on the grill’s probe. Check price on Amazon
- Food-grade hardwood pellets in a sealed container. Dry, consistent pellets feed reliably and reduce the risk of auger jams. Check price on Amazon
FAQ
Do I need to do a break-in burn on a camp chef pellet grill?
Yes, follow the manual. A break-in burn at a high setting for about an hour helps burn off manufacturing residue before you cook food on the grill.
What pellets should I use?
Use food-grade hardwood pellets from a reputable brand, and keep them dry in a sealed container. Match the wood to the flavor you want, and avoid pellets with unknown fillers or binders.
Why does my grill temperature swing up and down?
The most common causes are a dirty firepot, heavy ash buildup, damp pellets, or frequent lid opening. Clean the firepot, check the hopper, and resist peeking during the cook. Give the grill several minutes to stabilize after any setpoint change.
Can I use a camp chef pellet grill in the rain?
Many owners use a cover and a sheltered spot, but check your manual for weather guidance. Moisture in the hopper and electrical components is the main concern, so keep the unit covered and dry when not in use.
How do I know when the food is safe to eat?
Use an instant-read thermometer and check the internal temperature against a trusted food-safety guideline for the cut or protein you are cooking. For poultry, the USDA recommends 165°F. Consult a food-safety resource or a qualified professional if you have questions about specific cuts or health concerns.