 By Claire Whitaker
Updated November 2026
An easy juicy beef brisket recipe comes down to three things: a simple seasoning, low and steady heat, and enough time for the connective tissue to break down. This guide walks you through six steps that work in a standard oven or on a basic kettle grill, so you can serve sliceable, moist brisket without a dedicated smoker. You will finish with meat that holds its juices and pulls apart cleanly at the grain.
What You Need Before You Start
Brisket is a tough cut from the chest of the cow, packed with collagen. Cooked too hot or too fast, it turns dry and chewy. Cooked low and slow, that collagen converts to gelatin and the meat stays moist. Gather your supplies first so the cook goes smoothly.
Shopping for one? See our guide: Is Brisket Beef or Pork? Key Differences Explained (2026).
- A whole packer brisket, 10 to 13 pounds, or a flat-cut brisket of 4 to 6 pounds
- Kosher salt and coarse black pepper, or a commercial beef rub
- Heavy-duty aluminum foil or a roasting pan with a tight lid
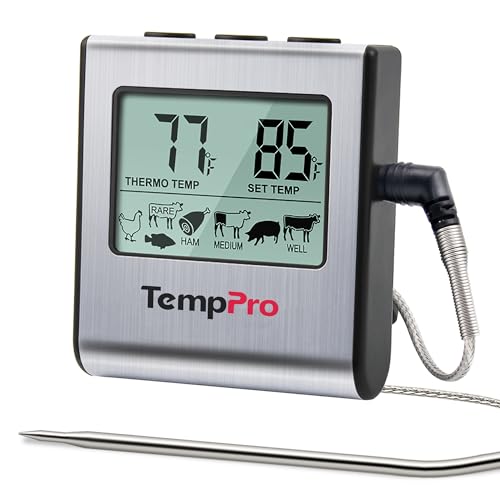
- An instant-read thermometer
- A cutting board and a sharp slicing knife
- Beef tallow, beef broth, or a little water for the wrap
Step 1: Choose and Trim the Brisket
Buy a brisket with a fairly even thickness and a fat cap of about a quarter inch. A whole packer includes both the flat and the point. The flat cooks more evenly and slices neatly, while the point has more marbling and works well for chopping or shredding. For a first attempt, a flat-cut brisket is easier to manage.
Trim the fat cap to about 1/4 inch. Leave the fat on: it bastes the meat as it renders. Remove any hard silver skin on the underside and any loose hunks of fat. Pat the meat dry with paper towels.
Step 2: Season the Meat Generously
Use about 1 tablespoon of kosher salt and 1 tablespoon of coarse black pepper per pound of meat as a starting point, adjusting to taste. Many pitmasters add garlic powder or paprika, but salt and pepper alone make a classic Texas-style result. If you use a commercial rub, follow the label’s coverage guidance and apply it to all sides.
Season the brisket at least an hour before cooking. Overnight is better. Salt needs time to penetrate the thick muscle, and it helps form a flavorful surface.
Step 3: Set Up Low and Steady Heat
Your target cooking temperature is between 225°F and 275°F. In an oven, 250°F is a reliable setting. On a kettle grill or charcoal setup, aim for indirect heat around 250°F to 275°F with a small wood chunk for smoke if you want that flavor. Keep the lid closed as much as possible, since every opening drops the temperature.
Place the brisket fat side up on a rack set over a roasting pan. The fat will baste the meat as it melts, and the pan catches drippings for later use in the sauce or wrap.
Step 4: Cook to Temperature, Not the Clock
Plan roughly 1 to 1.5 hours per pound at 250°F, but treat that as a rough guide. Brisket cooks in stages. The internal temperature climbs steadily to around 160°F, then stalls for an hour or more as moisture evaporates from the surface. This stall is normal and not a sign of a problem.
Start checking for doneness around 195°F to 205°F internal. The meat is ready when a probe or thermometer slides into the thickest part with little resistance, like going into soft butter. Check in more than one spot, especially in the point if you have a whole packer, because the thickness varies.
Step 5: Wrap for Moisture
When the brisket reaches about 165°F to 170°F and the bark has set to a deep mahogany color, wrap it. Place the brisket on a double layer of heavy-duty foil. Add 1/4 cup of beef broth, a splash of water, or a spoonful of melted beef tallow to the foil before sealing. Wrap tightly to trap steam.
Return the wrapped brisket to the heat and cook until it reaches the probe-tender stage described in Step 4. Wrapping speeds up the cook and keeps the juices in, which is the key to the juicy result you want.
Step 6: Rest, Then Slice Against the Grain
Pull the brisket from the heat and rest it, still wrapped, for at least one hour. A cooler works well for holding temperature. Resting lets the juices redistribute through the muscle fibers. Cutting too soon lets those juices run onto the board.
Unwrap and separate the flat from the point if you cooked a whole packer. Locate the grain, which runs in the direction of the long muscle fibers, and slice across it in strips about 1/4 inch thick. For the point, slice thicker or cut it into cubes.
Timing and Temperature Reference
| Stage | Internal Temperature | What You Should See |
|---|---|---|
| Going on the heat | Room temperature to 40°F range | Meat is seasoned and dry on the surface |
| Early cook | Up to about 150°F | Surface begins to darken and form bark |
| The stall | About 160°F to 170°F | Temperature holds steady for an hour or more |
| Wrap point | About 165°F to 170°F | Deep mahogany bark, firm surface |
| Done | About 195°F to 205°F | Probe slides in with little resistance |
| Rest | Hold above 140°F | Juices redistribute, meat firms slightly |
Common Mistakes to Avoid
- Cooking too hot. Temperatures above 300°F dry out the meat before the collagen breaks down.
- Pulling it too early. A brisket at 185°F is usually still tight. Trust the probe, not the number alone.
- Skipping the rest. Slicing right off the heat is the most common reason for dry slices.
- Slicing with the grain. Cutting along the fibers produces stringy, chewy pieces even when the meat is juicy.
- Trimming too much fat. The fat cap protects the meat and adds flavor.
- Opening the lid constantly. Each peek drops the cooking temperature and extends the cook.
Tips for Better Results
- Let the brisket come close to room temperature for about 30 minutes before it goes on the heat for more even cooking.
- Save the pan drippings. Skim the fat and use the rest as a base for a simple au jus.
- Cook a little extra. Leftover brisket reheats well in foil with a splash of broth.
- If you are new to brisket, read through how to cook beef brisket alongside this guide for more background on cuts and temperatures.
If you want to compare methods before committing, Easy Oven Brisket Recipe: Tender Results Without a Smoker covers the oven approach in more detail, while Texas Style Smoked Beef Brisket: 7 Steps to Juicy, Bark-Heavy Results goes deeper into smoke-forward cooking. For a hands-off option, Crock Pot Brisket Recipe: A Step-by-Step Guide for Tender Results shows how slow cooking can produce tender slices with minimal attention.
Recommended Gear
- Instant-read thermometer. A fast, accurate probe is the single most useful tool for knowing when brisket is done. Look for a digital instant-read model. View on Amazon
- Leave-in probe thermometer. A wired or wireless probe lets you monitor temperature without opening the lid. View on Amazon
- Heavy-duty aluminum foil. Thicker foil resists tearing during the wrap and keeps steam sealed in. View on Amazon
- Insulated cooler for resting. A cooler holds the brisket warm for an hour or more without further cooking. View on Amazon
FAQ
What is the easiest way to keep brisket juicy?
Cook it low, around 250°F, wrap it in foil with a little liquid once the bark has set, and rest it for at least an hour before slicing. Those three steps account for most of the moisture in the finished meat.
What internal temperature should brisket reach?
Most cooks pull brisket between 195°F and 205°F internal, checking for a probe that slides in easily. The exact number matters less than the feel of the probe, since tenderness varies between cuts.
Should I cook brisket fat side up or fat side down?
Fat side up is the common approach in an oven or grill, so the rendering fat bastes the meat. Some cooks place it fat side down in a pan to protect the bottom from direct heat. Either works if the temperature stays low.
Why does my brisket stall?
The stall happens when evaporative cooling from the surface balances the heat coming in, usually around 160°F to 170°F. It is normal. Wrapping the meat speeds things up by trapping heat and moisture.
Can I make brisket without a smoker?
Yes. An oven set to 250°F produces tender, juicy brisket with a good crust. Adding a small amount of smoked paprika or liquid smoke can mimic some of the smoke flavor, though it will not match wood smoke exactly.
How long should brisket rest?
At least one hour, wrapped and held in a cooler or a warm oven below 150°F. Longer rests of two to three hours are common and do not usually hurt the meat if it stays warm.
Do I need to slice brisket against the grain?
Yes. Slicing across the muscle fibers shortens them, which makes each bite tender. Slicing with the grain leaves long fibers that feel stringy and tough.
Is it safe to leave brisket in a warm cooler for a long time?
Keep the internal temperature above 140°F during the rest and avoid holding it for more than a few hours. If you need a longer hold, consult your local food safety guidance for holding cooked meat.
Conclusion
An easy juicy beef brisket recipe depends on simple seasoning, low steady heat, a foil wrap, and a proper rest. Cook to probe tenderness rather than a fixed time, and resist the urge to slice early. Follow these six steps and you will produce brisket that is moist, sliceable, and full of flavor, whether you cook it in the oven or on a grill.
Related reading
- Easy Oven Cooked Beef Brisket Recipe with Video: 5 Simple Steps
- Beef Brisket Recipe Oven: Step-by-Step Guide for Tender Results
- Easy 3 Ingredient Crock Pot Beef Brisket Recipe: Steps and Tips
Ready to choose one?
About Claire Whitaker
Claire Whitaker is part of our editorial team and reviews and edits our BBQ & grilling guides, checking product details against manufacturer specifications and owner feedback.