
As an Amazon Associate we earn from qualifying purchases. This page may contain affiliate links.
This easy oven cooked beef brisket recipe with video walks you through the full process: trimming a packer brisket, seasoning it, cooking it low and slow in your oven, wrapping it at the stall, and resting it so every slice stays moist. You don’t need a smoker. A standard oven, a probe thermometer and about 12 to 14 hours of patience will get you tender, sliceable brisket with real beef flavor and a dark, peppery bark.
Oven brisket won’t have the smoke ring or the wood-fired aroma of a offset or pellet cook. What it does deliver is consistency. The oven holds a steady temperature, the pan catches drippings for gravy, and the method works the same way whether it’s 20 degrees outside or 90. Use the video alongside these steps to check the color of the bark and the texture of the wrap at each stage.
What You Need Before You Start
Brisket is a large, connective-tissue-heavy cut from the lower chest of the cow. A whole packer brisket usually includes two muscles: the flat and the point. For oven cooking, plan on a packer in the 10 to 14 pound range. Smaller flats can dry out quickly because they have less fat to baste the meat as it renders.
Equipment checklist
- A heavy roasting pan with a rack, large enough to hold the brisket flat with room around it
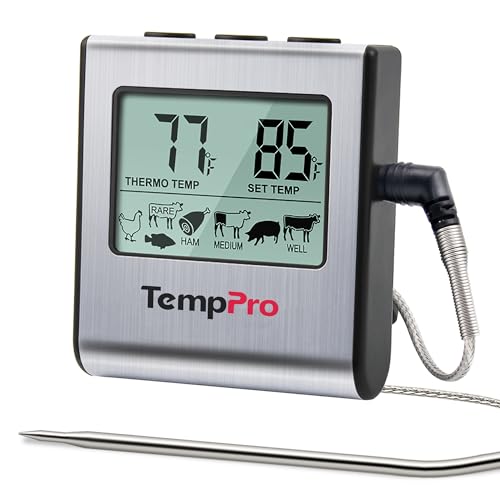
- A leave-in or dual-probe meat thermometer, plus an instant-read thermometer for spot checks
- Butcher paper or heavy-duty aluminum foil for the wrap
- A sharp boning or slicing knife and a cutting board with a groove or drip channel
- Kosher salt and coarse black pepper (or your favorite beef rub)
- About 1 cup of beef broth or water for the pan
- Insulated cooler or a towel-lined cooling bag for resting
Ingredients for a 12-pound packer
- 1/2 cup kosher salt (about 1 tablespoon per pound, adjusted to taste)
- 1/4 cup coarse black pepper
- Optional: 1 tablespoon garlic powder, 1 tablespoon onion powder, 1 teaspoon smoked paprika
- 1 cup beef broth or water for the pan
Salt-and-pepper brisket is a long-standing Texas-style approach, and it’s the simplest way to start. Once you’ve cooked it once, you can adjust the rub.
Step-by-Step: Cooking Easy Oven Brisket
Step 1: Trim the fat cap
Set the brisket fat side up on a cutting board. Trim the hard, thick fat down to about 1/4 inch across the surface. Leave the fat cap in place. It protects the meat and bastes it as it renders. Remove any loose hard fat from the edges and the deckle (the thick seam between flat and point), and square off any thin, dry corners so they don’t burn.
Step 2: Season and rest overnight (optional)
Mix the salt, pepper and any extra spices. Pat the brisket dry with paper towels, then coat all sides evenly. Heavier coverage gives a stronger crust. Wrap the seasoned brisket loosely in plastic or set it on a rack in the fridge, uncovered if you want a drier surface. Letting it sit 8 to 24 hours helps the salt penetrate. If you’re short on time, season right before the oven.
Step 3: Set up the oven and pan
Preheat the oven to 275°F (135°C). Set the rack in the middle position. Place the brisket fat side up on the rack in your roasting pan. Pour the broth or water into the bottom of the pan, not over the meat. The liquid adds humidity and makes it easier to clean up the drippings later.
Step 4: Insert the probe and start cooking
Insert your probe into the thickest part of the flat, avoiding the fat cap and any bone-like areas. Make sure the probe tip sits in the center of the meat. Close the oven door and leave it closed as much as possible. Opening it drops the temperature and extends your cook time.
Expect the cook to take roughly 60 to 90 minutes per pound at 275°F, though this varies with the brisket’s size, fat content and how much it has been trimmed. Go by internal temperature, not the clock.
Step 5: Wrap at the stall
Between about 160°F and 170°F, the internal temperature will flatten out for hours. This is the stall, caused by moisture evaporating from the surface and cooling the meat. You can wait it out, but wrapping speeds things up and keeps the meat juicy.
Lay out a double sheet of butcher paper or foil. Place the brisket fat side down in the center, then fold the paper tightly around it. Butcher paper lets some moisture escape and keeps the bark firm. Foil traps moisture and softens the bark more. Return the wrapped brisket to the pan, fat side up, and keep cooking.
Step 6: Cook to tender, not just to a number
Most briskets finish between 195°F and 205°F internally. The temperature alone doesn’t tell you when it’s done. Start checking tenderness around 195°F by inserting the probe into the flat. It should slide in with almost no resistance, like going into a jar of peanut butter. If you feel resistance, keep cooking and check again in 30 minutes.
Step 7: Rest the brisket
Pull the brisket when it’s tender and let it rest. Keep it wrapped and set it in an empty cooler lined with towels, or hold it in the oven at 150°F to 170°F. A minimum of one hour is good. Two hours is better for a larger packer. Resting lets the juices redistribute and keeps the meat from spilling out when you cut it.
Cook Timeline and Target Temperatures
The table below gives typical checkpoints for a 12-pound packer cooked at 275°F. Your times will differ based on the brisket’s shape and starting temperature, so use these as benchmarks.
| Stage | Internal temperature | Approximate elapsed time | What to look for |
|---|---|---|---|
| Start | Refrigerator temp (around 38°F to 40°F) | 0 hours | Brisket is dry and evenly seasoned |
| Early cook | 120°F to 150°F | 2 to 4 hours | Surface starts to darken, fat begins to render |
| Stall | 160°F to 170°F | 5 to 7 hours | Temperature flattens; wrap now |
| Late cook | 180°F to 195°F | 8 to 11 hours | Wrapped brisket firms slightly; bark is set |
| Done | 195°F to 205°F | 10 to 13 hours | Probe slides in with little resistance |
| Rest | Above 140°F | 1 to 2 hours | Juices settle; slicing is cleaner |
Slicing and Serving
Unwrap the brisket over the cutting board and save the liquid that has collected in the paper or foil. Separate the flat from the point by feeling for the seam of fat between them, then cut through it. The flat is leaner and slices neatly. The point has more marbling and is good for chopped beef or burnt ends.
Slice the flat across the grain, about 1/4 inch thick for a classic look. Cut the point against the grain too, but it can be sliced slightly thicker or cubed. Skim the fat from the drippings and warm the remaining juice for a simple jus to pour over the slices.
Common Mistakes
- Trimming off too much fat. The fat cap protects the meat and adds moisture. Leave about 1/4 inch.
- Cooking at too high a temperature. Going above 300°F can dry the flat before the connective tissue breaks down. Stick to 250°F to 275°F.
- Pulling it at 195°F without checking tenderness. Temperature is a guide. A probe test tells you whether the connective tissue has softened.
- Opening the oven door constantly. Each opening drops the temperature and adds time. Check the probe through the door or use a leave-in wire.
- Skipping the rest. Slicing too soon sends juices onto the board instead of into the meat.
- Wrapping too early. If you wrap before the bark sets, you lose the crust. Wait until the stall and a firm, dark surface.
- Using a dull knife. A long, sharp blade gives clean slices. A short, dull one tears the grain.
Tips for Better Oven Brisket
- Choose a brisket with a flexible feel and even thickness. Thin points cook faster than thick flats, so check them early.
- Keep salt even. Too much on one side makes the bark uneven.
- If the bark looks pale near the end, unwrap for the last 20 minutes at 300°F to firm it up.
- Save the fat you trim. Rendered beef tallow adds flavor to roasted vegetables or fried potatoes.
- If you’re new to large cuts, practice on a smaller brisket flat first. The same method applies, with a shorter cook.
For more on how brisket compares with other beef cuts and when each one works best, see How to BBQ Different Beef Cuts: From Brisket to Ribeye. If you want to build out a menu around the brisket, Beginner BBQ Meat Recipes: Burgers, Chicken, Pork Shoulder and Steak has simple companion recipes that use similar techniques. Cooks who like precise steak temperatures may also find The Reverse Sear Method for Perfectly Cooked Steak useful for other beef projects.
Recommended Gear
A few inexpensive tools make this recipe far easier to repeat. A dual-probe thermometer lets you track the flat and point without opening the oven, and a roll of pink butcher paper keeps the bark intact during the wrap. A heavy roasting pan with a rack keeps the brisket off the bottom and makes cleanup simpler.
- Dual-probe wireless meat thermometer: Lets you monitor the brisket from outside the oven, so you avoid losing heat every time you check. Check price on Amazon
- Pink butcher paper roll: Allows moisture to escape while keeping the bark firm during the wrap. Check price on Amazon
- Heavy-duty roasting pan with rack: Elevates the brisket for even airflow and holds drippings for jus. Check price on Amazon
FAQ
What temperature should I cook brisket in the oven?
Cook at 250°F to 275°F (121°C to 135°C). Lower temperatures take longer but produce more tender meat. Going above 300°F tends to dry out the flat.
How long does oven brisket take?
Plan roughly 60 to 90 minutes per pound at 275°F. A 12-pound packer usually takes 10 to 13 hours. Use internal temperature and a probe tenderness test rather than relying on time alone.
Should I wrap brisket in foil or butcher paper?
Foil speeds the cook and keeps the meat very moist, but it softens the bark. Butcher paper lets some moisture out and keeps the crust firmer. Either works well, so choose based on the texture you want.
Can I cook brisket without a probe thermometer?
You can, but it’s risky for a large cut. Without a probe, you can’t reliably judge the stall, the wrap timing or tenderness. A leave-in probe is one of the most useful tools for this recipe.
Is it safe to leave brisket out while resting?
Keep the rested brisket above 140°F, either in a cooler with towels or in a warm oven. Don’t leave cooked meat at room temperature for more than two hours. For specific food safety questions, such as holding times for a large event, check guidance from your local health department or the USDA.