
As an Amazon Associate we earn from qualifying purchases. This page may contain affiliate links.
An oven baked brisket recipe gives you sliceable, tender beef with a peppery bark and a rich, beefy drip, all without a smoker or a backyard full of charcoal. You season a flat-cut or whole packer brisket, cook it low at 275°F until the connective tissue breaks down, wrap it to power through the stall, and rest it before slicing. Expect a 5-pound flat to take roughly 5 to 7 hours, and plan on a longer rest than you think you need.
This guide walks through the full process: picking the meat, building the rub, setting up the oven, managing the stall, and knowing when the brisket is done. It also covers the mistakes that cause dry or stringy results, plus a few gear suggestions that make the job easier.
What You Need Before You Start
Oven brisket is forgiving once you understand the basics, but it does reward a little preparation. Gather these items first:
- One brisket, 4 to 7 pounds for a flat, or a whole packer up to about 12 pounds
- Kosher salt and coarse black pepper, or a commercial beef rub
- Garlic powder, onion powder, smoked paprika, and optional brown sugar
- Beef broth or beef stock, about 1 cup
- Heavy-duty aluminum foil or unwaxed butcher paper
- A large roasting pan with a lid, or a deep pan you can cover tightly with foil
- A leave-in or instant-read meat thermometer
- A sharp long slicing knife and a cutting board with a juice groove
- Clean kitchen towels or a dry cooler for resting
If you are new to cuts like this, the broader primer on How to BBQ Different Beef Cuts: From Brisket to Ribeye explains why brisket needs long, low cooking and how it differs from steaks and roasts.
Step 1: Choose the Right Brisket
Brisket comes in two main pieces. The flat is leaner, cooks more evenly, and is easier to slice into uniform pieces. The point is fattier and more forgiving, with more marbling. A whole packer includes both. For an oven recipe, a flat between 4 and 6 pounds is the easiest starting point. Look for a piece with an even thickness and a fat cap of about 1/4 inch. If you buy a whole packer, you can trim the fat cap to roughly 1/4 inch and cook it as-is; it just needs more time.
Ask the butcher whether the brisket is “untrimmed” or “trimmed.” Untrimmed meat has more fat and sometimes a better result in the oven, because the fat bastes the meat as it renders.
Step 2: Build a Simple Dry Rub
Brisket can take a bold seasoning. A basic rub for a 5-pound flat looks like this:
- Combine 3 tablespoons coarse kosher salt, 2 tablespoons coarse black pepper, 1 tablespoon garlic powder, 1 tablespoon onion powder, 1 tablespoon smoked paprika, and 1 teaspoon ground cumin.
- Add 1 tablespoon brown sugar if you want a slightly sweet bark. It helps browning but can scorch in very hot ovens, so keep your oven at 275°F as directed.
- Pat the brisket dry with paper towels. Coat all sides evenly, including the edges.
- Wrap the seasoned brisket in plastic and refrigerate it for at least 4 hours, or overnight. The salt penetrates the meat and improves moisture retention.
Use about 1/4 cup of rub for a 5-pound flat. Don’t be shy with the salt, but don’t stack the rub so thick that it forms a paste.
Step 3: Set Up Your Oven
Preheat the oven to 275°F. Position a rack in the lower third so the brisket sits near the center of the oven. Place the brisket fat side up in a roasting pan. Pour 1 cup of beef broth into the bottom of the pan, not over the meat, so the surface bark stays intact.
Insert your thermometer probe into the thickest part of the flat, away from the bone or the fat seams. If you use a leave-in probe with a cable that runs out through the oven door, keep the door sealed as much as possible.
Cover the pan tightly with foil or the lid. Some cooks prefer to start uncovered for the first two hours to build bark, then cover. Both methods work. The uncovered start gives a firmer crust; the covered start gives a moister, more even result.
Step 4: Cook Low and Track Temperature
Here is a practical timeline for an oven at 275°F:
| Brisket Size | Approximate Cook Time (Uncovered to Wrap) | Approximate Total Time |
|---|---|---|
| 3 to 4 lb flat | 1.5 to 2 hours | 4 to 5 hours |
| 5 lb flat | 2 to 2.5 hours | 5 to 7 hours |
| 8 to 10 lb whole packer | 3 to 4 hours | 8 to 11 hours |
These are estimates. Meat thickness, starting temperature, and oven accuracy all change the timing. Judge by temperature, not the clock.
Here are the key checkpoints:
- Around 150°F to 165°F internal: The stall begins. Evaporative cooling slows the temperature rise, sometimes for two hours or more.
- Bark check: When the surface looks dark mahogany and set, wrap the brisket.
- Wrap point: Tightly wrap the brisket in heavy-duty foil or unwaxed butcher paper, and return it to the oven. Foil yields a softer bark; butcher paper preserves more crust. Both are standard.
- Finish around 195°F to 203°F internal: The brisket should probe with almost no resistance, like a knife sliding into soft butter.
Check the temperature every hour or so, but don’t open the oven repeatedly. Each door opening drops the heat and extends the cook.
Step 5: Rest the Brisket Properly
Resting is not optional. A brisket pulled straight from the oven will release juice when cut, leaving the slices dry. Wrap the finished brisket in towels, place it in a dry cooler, and let it rest for at least 1 hour. Two hours is better for a large packer. A cooler holds heat well enough that the brisket stays hot without drying out.
Save the drippings in the pan. Skim off the fat, then pour the remaining jus over the sliced meat or serve it on the side.
Step 6: Slice Against the Grain
Brisket has long muscle fibers running in one direction across the flat. Locate the grain before you cut. For a flat, slice across the grain in pieces about 1/4 inch thick. For the point, slice across the grain at a similar thickness, or cut into cubes for burnt ends. A long, sharp slicing knife glides through the meat and keeps the slices intact.
Common Mistakes to Avoid
- Cooking too hot. At 350°F or higher, the outside cooks faster than the connective tissue can break down, and the result is chewy. Stay at 250°F to 275°F.
- Pulling the brisket too early. Temperature alone is not the finish line. If the probe still meets resistance at 195°F, keep going.
- Skipping the rest. Slicing right away lets the juices run out. Give it time.
- Cutting with the grain. Long, stringy pieces come from slicing parallel to the fibers. Turn the brisket and cut across them.
- Drowning the bark. Pour broth in the pan, not over the meat. Soggy seasoning loses its texture.
- Trusting a single temperature reading. Probe several spots. The flat and point can differ by 5 to 10 degrees.
- Using too little rub. Brisket is a big piece of meat. Under-seasoning shows up in every bite.
Tips for Better Oven Brisket
- Let the brisket sit at room temperature for 30 to 45 minutes before it goes in the oven, if your food-safety plan allows. This helps it cook more evenly. Keep it refrigerated during the rub resting period and never leave raw meat out for extended periods.
- Add a splash of Worcestershire or a tablespoon of tomato paste to the broth for a deeper flavor in the drippings.
- If the bark looks too pale at the wrap point, increase oven heat by 10 to 15 degrees for 20 minutes, then drop back to 275°F. Don’t go higher overall.
- For leftovers, keep sliced brisket in its jus, cover it tightly, and reheat it gently at around 250°F until warm throughout.
- If you want more info on other slow-cooked meats, see Beginner BBQ Meat Recipes: Burgers, Chicken, Pork Shoulder and Steak for techniques that transfer well to a home oven.
Recommended Gear
These tools make oven brisket more predictable, though none are strictly required.
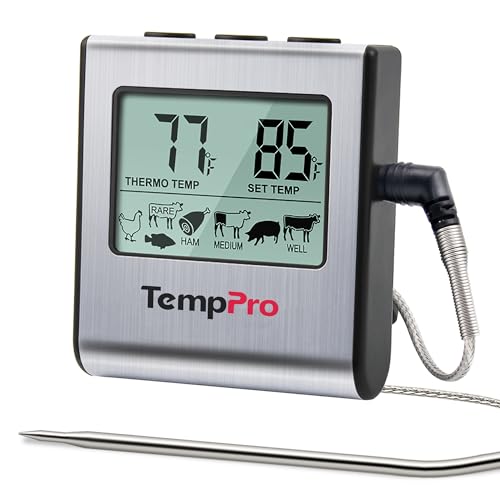
- Leave-in probe thermometer with a cable: Monitoring internal temperature without opening the oven keeps the cook steady and reduces guesswork. Check price on Amazon
- Butcher paper for wrapping: Unwaxed butcher paper lets moisture escape while protecting the bark from getting soggy. Check price on Amazon
- Heavy roasting pan with a tight lid: A deep pan with a fitted lid holds the broth and seals in steam during the covered phase. Check price on Amazon
- Long slicing knife: A long, thin blade slices brisket cleanly across the grain without tearing the slices. Check price on Amazon
FAQ
Can I make oven brisket without wrapping it?
You can, but wrapping shortens the stall and keeps the meat moist. An unwrapped brisket will take longer and dry out more, especially a flat. If you skip the wrap, add more broth to the pan and check it often.
What internal temperature should oven brisket reach?
Aim for 195°F to 203°F, and check tenderness by probing. The probe should slide in with little resistance. Brisket is safe to eat well before that point, but it will be tough.
Why is my oven brisket tough?
Most often it was pulled too early, cooked at too high a temperature, or sliced with the grain. Give it more time at 275°F, probe for tenderness, and rest it properly.
Should I use a flat or a whole packer for oven cooking?
A flat is easier to manage and more consistent for a first attempt. A whole packer delivers more fat and flavor but needs a larger pan and a much longer cook.
How long does leftover brisket keep?
Refrigerate sliced brisket in airtight containers and eat it within three to four days. For longer storage, freeze it in portions with some of the juices. If you have health concerns or questions about food safety, check current USDA guidance or talk with a food-safety professional.